Radon is a naturally occurring radioactive gas that can pose serious health risks if it accumulates to high levels inside your home. Performing radon testing is crucial to ensure that your living environment is safe. In this blog post, we’ll discuss 8 things to watch for during radon testing to help you understand the process and ensure accurate results.
What is Radon and Why is Testing Important?
Before diving into the specifics of radon testing, it’s essential to understand what radon is and why testing is necessary:
What is Radon?
Radon is a colorless, odorless gas produced by the natural decay of uranium in soil and rock. It can enter your home through cracks in floors and walls, construction joints, and gaps around service pipes.
Health Risks
Long-term exposure to high levels of radon can lead to serious health issues, including lung cancer. Radon is the second leading cause of lung cancer after smoking, making radon testing an essential component of maintaining a healthy home.
1. Choose the Right Time for Testing
The timing of radon testing can significantly impact the accuracy of your results. Here’s what to consider:
Seasonal Factors
- Winter Testing: Radon levels are often higher in the winter when homes are sealed tightly against the cold. This is a good time for testing because it reflects the worst-case scenario.
- Summer Testing: In warmer months, homes may be more ventilated, potentially resulting in lower radon levels. It’s still important to test, but be aware that levels might be lower than in winter.
Testing Duration
- Short-Term Testing: These tests typically last between 2 to 90 days and are useful for a quick assessment of radon levels.
- Long-Term Testing: For more accurate results, long-term testing (lasting 90 days to a year) is recommended to account for seasonal variations.
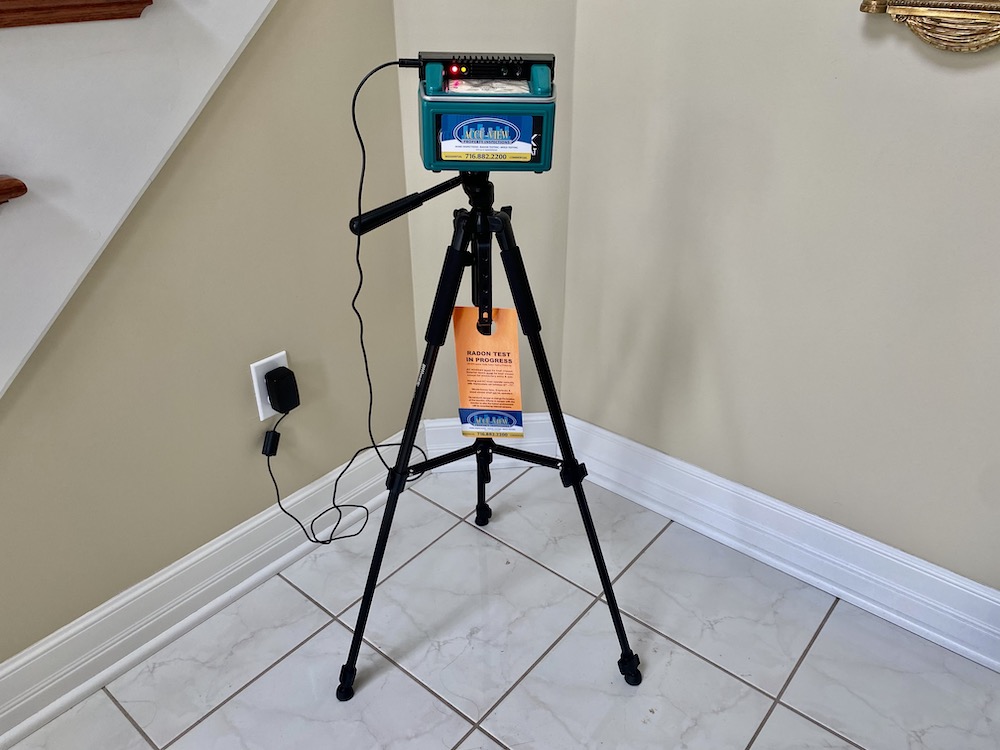
2. Ensure Proper Placement of Test Kits
The placement of radon test kits is crucial for obtaining accurate results. Follow these guidelines for correct placement:
Location
- Low Areas: Place test kits in the lowest lived-in area of your home, such as a basement or ground-level room.
- Avoid High Traffic Areas: Do not place test kits in high traffic areas or near air vents, fans, or open windows, as these can affect results.
Distance from Walls
- Positioning: Keep the test kit away from walls, vents, and other objects that might obstruct airflow and affect readings. The recommended distance is at least 4 inches from walls and furniture.
3. Follow All Instructions Carefully
Properly following the instructions provided with your radon testing kit is crucial for obtaining accurate results:
Read Instructions Thoroughly
- Pre-Test Preparations: Ensure you understand and follow any pre-test instructions, such as closing windows and doors.
- Test Kit Handling: Handle the test kit according to the manufacturer’s instructions to avoid contamination or damage.
Post-Test Procedures
- Return Kit Promptly: After the test period, promptly send the kit to the laboratory for analysis. Delays can affect the accuracy of results.
- Record Conditions: Note any unusual conditions that might have affected the test, such as extreme weather or significant changes in ventilation.
4. Avoid Interference During Testing
Certain factors can interfere with radon testing and impact the accuracy of results. Be mindful of the following:
Ventilation Changes
- Keep Windows Closed: During the test period, avoid opening windows and doors, as this can affect radon levels.
- Minimize Use of Fans: Reduce the use of fans and HVAC systems, as these can alter the air circulation and impact test results.
Avoid Construction Activities
- Postpone Renovations: If possible, avoid major construction or renovation work during the testing period, as this can disturb radon levels and affect the results.
5. Be Aware of False Negatives and Positives
Radon testing can sometimes produce false negatives or positives. Here’s what to be aware of:
False Negatives
- Low Levels Detected: Sometimes, short-term tests may show lower radon levels that do not accurately reflect average annual levels. Consider conducting long-term testing for a more accurate assessment.
False Positives
- High Levels Detected: Occasionally, test results may indicate higher radon levels than actual levels due to temporary conditions. Retesting can help confirm the results.
6. Understand the Radon Levels and Action Thresholds
Interpreting your radon test results correctly is vital. Familiarize yourself with the radon levels and action thresholds:
Radon Measurement Units
- Picocuries per Liter (pCi/L): Radon levels are measured in picocuries per liter. The EPA recommends taking action if levels are 4.0 pCi/L or higher.
Action Thresholds
- Below 4.0 pCi/L: While levels below 4.0 pCi/L are considered acceptable, it’s still a good idea to monitor radon levels periodically.
- Above 4.0 pCi/L: If radon levels are above 4.0 pCi/L, it’s important to take steps to reduce radon levels in your home.
7. Consider Professional Radon Testing
While DIY test kits are useful, professional radon testing offers a higher level of accuracy. Here’s why you might consider professional help:
Expert Analysis
- Accurate Measurements: Professional radon testers use advanced equipment and techniques for precise measurements.
- Comprehensive Reporting: Professionals provide detailed reports and recommendations based on test results.
Radon Testing Phoenix
If you’re in the Phoenix area, consider professional Radon Testing Phoenix services for an accurate assessment of radon levels in your home. They offer expertise and advanced equipment for reliable results.
8. Addressing Radon Issues
If your radon test results indicate high levels, it’s crucial to address the issue promptly. Here’s what to do:
Radon Mitigation Systems
- Install a System: Radon mitigation systems, such as soil depressurization, can effectively reduce radon levels in your home.
- Consult Professionals: Work with a radon mitigation professional to design and install an effective system.
Follow-Up Testing
- Confirm Results: After installing a mitigation system, perform follow-up testing to ensure that radon levels have been reduced to acceptable levels.
- Regular Monitoring: Continue monitoring radon levels periodically to ensure that they remain low.
Conclusion
Understanding 8 things to watch for during radon testing can help you ensure that your radon tests are accurate and reliable. By choosing the right time for testing, ensuring proper placement of test kits, and avoiding interference, you can obtain meaningful results that reflect the true radon levels in your home.
Be aware of potential false positives and negatives, and understand the radon levels and action thresholds. Consider professional radon testing services, such as Radon Testing Phoenix, for accurate measurements and expert advice. If high radon levels are detected, take prompt action to address the issue and protect your health.
By following these guidelines, you can effectively manage radon levels in your home and maintain a safe and healthy living environment.
Also, read this: What is the Significance of Channels in a Cooling Framework?